
We may earn money or products from the companies mentioned in this post.
Nowadays websites have become more dynamic and richer in content which can increase the initial load time when browsed from another side of the world.
The average page site according to GTMetrix is 2.9MB.
But as you might know, slower sites are a big NO when it comes to overall user-experience, SEO and Google rankings.
As per Google, the ideal upload time for an average site is less than a second.
Slower sites contribute to less satisfying user experience which Google does not like at all and it’s worse on mobile devices. To overcome this situation, Content Delivery Network (CDN) plays an important part in delivering content of your WordPress site to your users around the world.
Therefore, we intend to explore further in this article the various aspects through which WordPress CDN service can make your site faster and look at different options for integrating CDN to a WordPress site.
- What is CDN?
- How CDN Works?
- Do I Need a CDN in WordPress?
- Popular CDN Providers
- CDN Integration to WordPress Site
- Benefits of Having a CDN in WordPress
What is CDN?
Content Delivery Network or CDN is used to deliver content instantly to the end user. It takes a while for the web page to load if the server is pinged for every request especially if the server is located far away from the user.
This is also known as latency which CDN was built to overcome. Instead of pinging web server for every request; CDN keeps a copy of the web page and delivers it to the end user for every subsequent request from its nearest server.
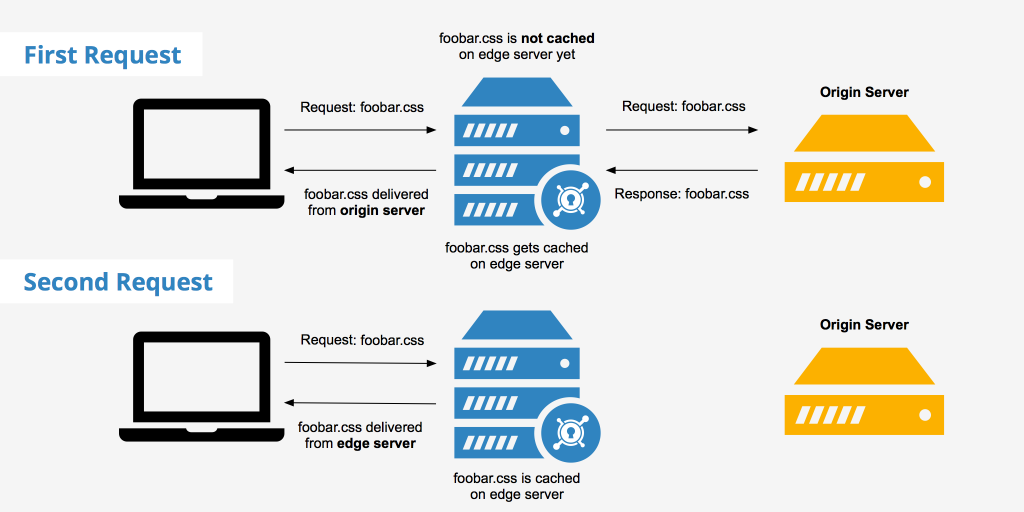
Source: KeyCDN
Above image is taken from KeyCDN. It demonstrates how CDN server caches the CSS file requested only once from the origin server and is delivered from the CDN server on subsequent requests.
How does CDN work?
To understand how CDN works, it is important to understand why CDN was needed at first place. A website is hosted on a web server which has a single physical location. If the user is located near to this server location then the content delivered from the web server will be faster as compared to the user browsing from the other side of the world.
For example, if the web server is located in London, UK; user browsing from Germany or Spain will get a faster response as compared to the user browsing all the way from Russia.
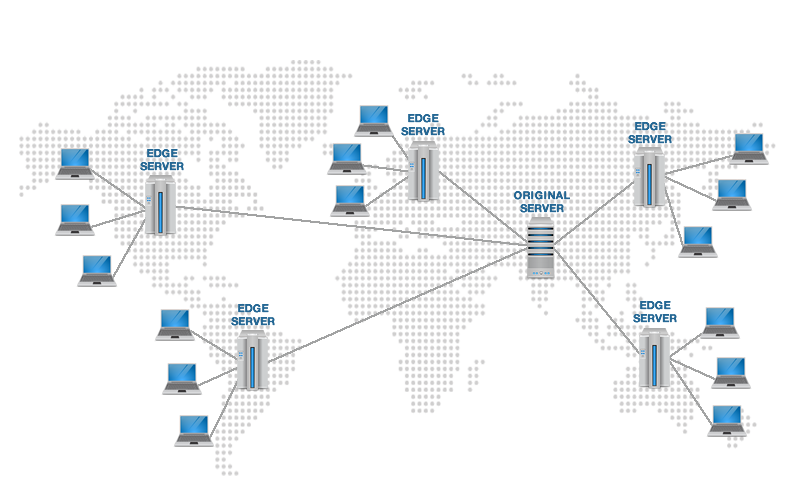
CDN servers delivering content to the users inside their domain
To avoid this latency in delivering the content; CDN makes a copy of these web pages and stores them in its servers spread all over the world. To ensure faster delivery to every user, CDN makes use of its PoPs (points of presence) located in multiple locations around the world. These PoPs contain multiple servers which are responsible for delivering content to the user visiting the site inside its parameters. CDN delivers both static and dynamic content which includes media files, HTML, JavaScript and CSS files.
Do I need a CDN on a WordPress site?
CDN is essential for every website which has a global audience. It does not matter if you are running a blog or an online store, Content Delivery Network (CDN) significantly improves the user experience and increases overall productivity.
CDN services are widely used and are getting popular among WordPress users who wish to offer better experiences to their users. The list of businesses using CDN services is huge – Digital Agencies; Entertainment; Health Care; E-Commerce; Education and Advertising to name a few.
There is one exception where CDN might not be the best option. If you are running a strictly localized business and the majority of your targeted audience belongs to your locality then using a CDN might actually make things worse. That’s because it will add an additional unnecessary layer of CDN servers which is not needed since the actual web server is within the reach and does not require another resource to deliver the content.
Popular CDN Providers & Setup Process (Step-by-Step)
There are many companies which offer CDN services and have different packages to choose from. We suggest doing your research before investing in a provider. You may consider the following to begin with.
In the past, it used to be a bit of challenge to integrate CDN to a WordPress site as it required to be configured in many places. Things have changed now with the advent of modern plugins; adding a CDN to WordPress site is only a matter of few steps.
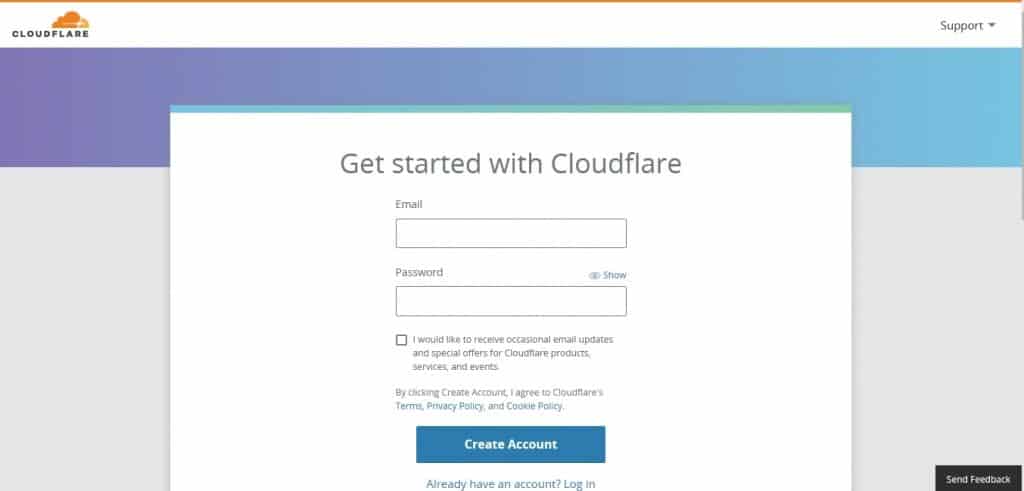
CloudFlare CDN Setup Process
The next CDN we will be integrating to our WordPress site is CloudFlare. This CDN too is very popular among the WordPress users because of its performance, security and FREE subscription.
To set up the account, simply visit their website and create an account.
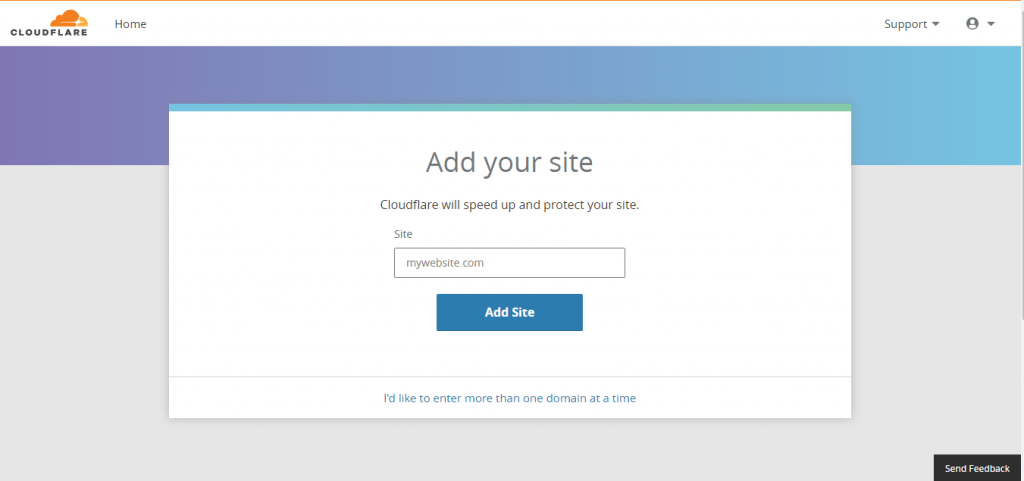
Once the account is created, you will be asked to Add a Site.
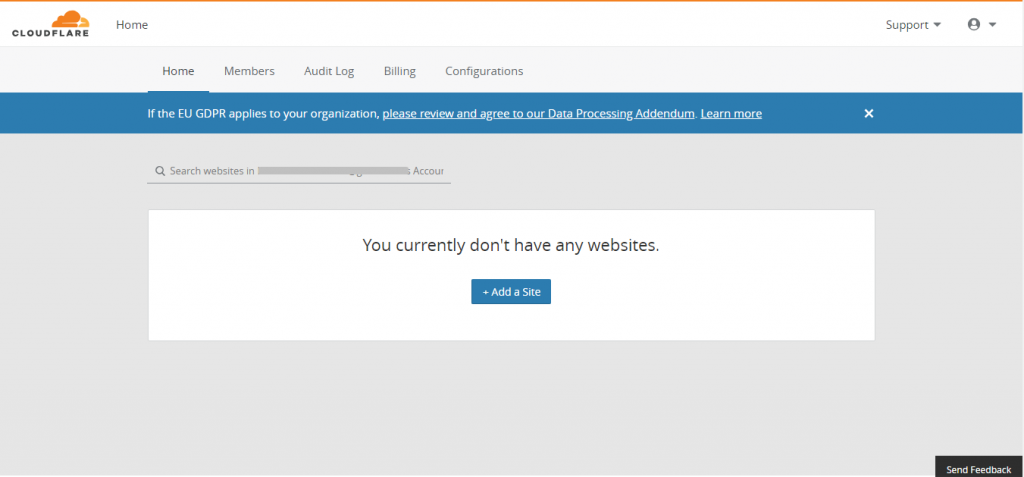
Enter your website URL and click on Add Site button to proceed.
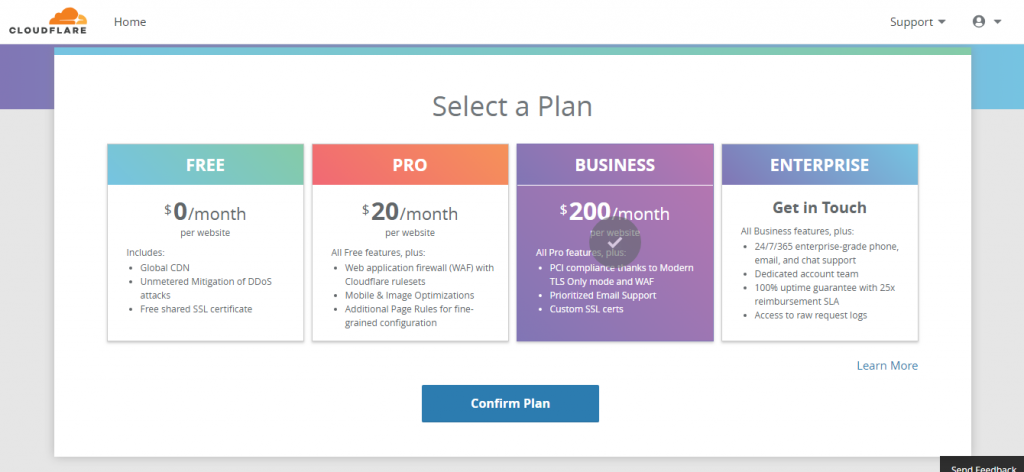
On the next screen, select the subscription plan you would like to have with CloudFlare. In this article, we will be using the FREE version.
After confirming the subscription plan, the website will scan your DNS record.
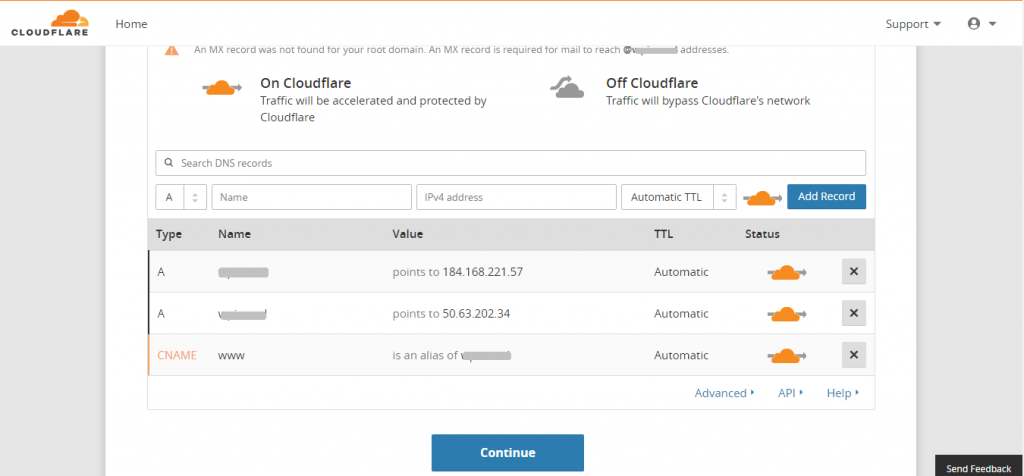
Click on Continue to receive new Nameservers.
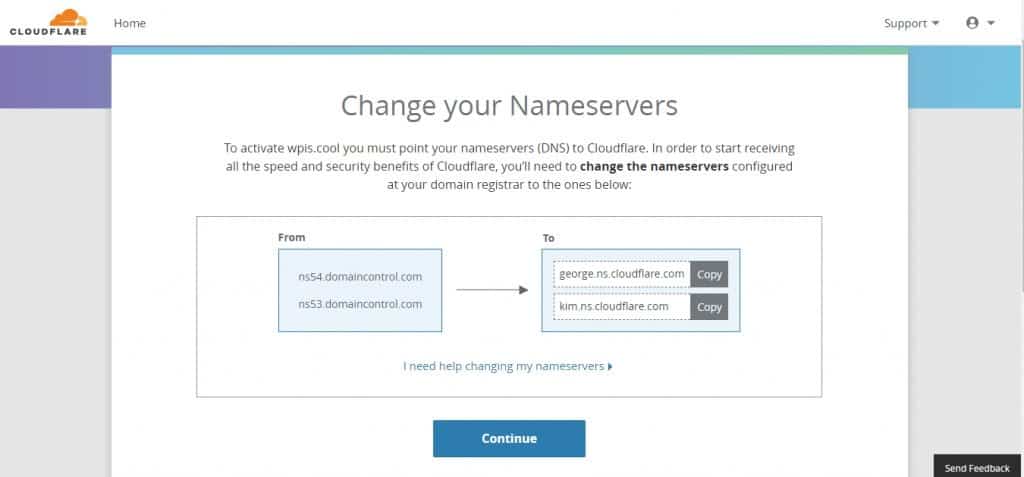
Replace your existing Nameservers from the Nameservers provided by CloudFlare and click Continue. It can take around 24 hours to make the switch and once it’s done you will see the status activated and the content of your site will be delivered from CloudFlare servers.
To integrate any CDN to a WordPress site the processes are pretty much the same. However, it is important to analyze which CDN provider can serve you better before investing in it. The main objective might be the same but they all come with different features and pricing.
KeyCDN
This is one is a high-performing and widely used CDN. You may try out their service by signing up for their trial version. For this article, we will be using their trial version as well.
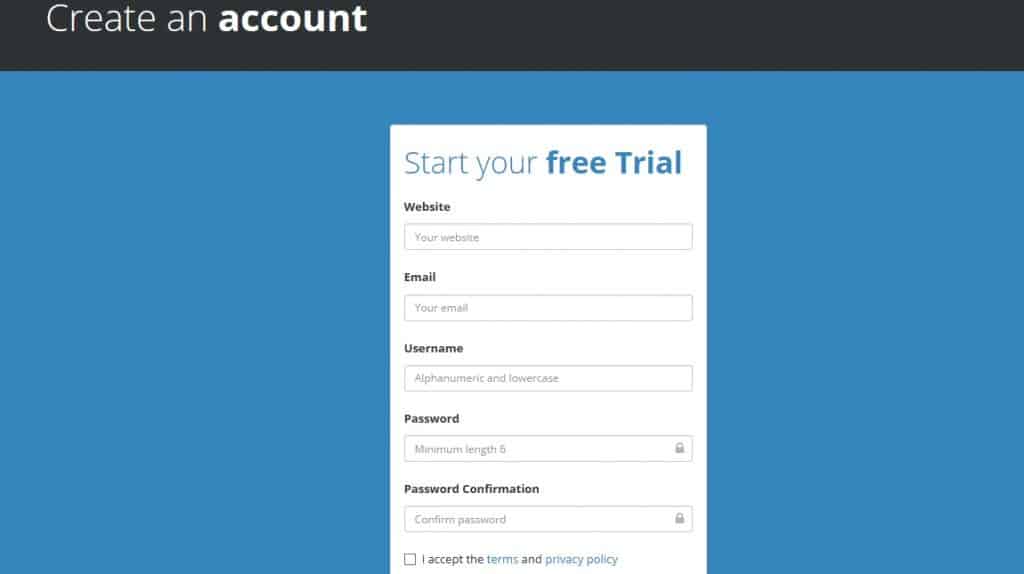
Visit their official website and create an account. Once the account is created, a confirmation email will be sent to your email address. By confirming the email your account will be activated and you will be able to access the dashboard.
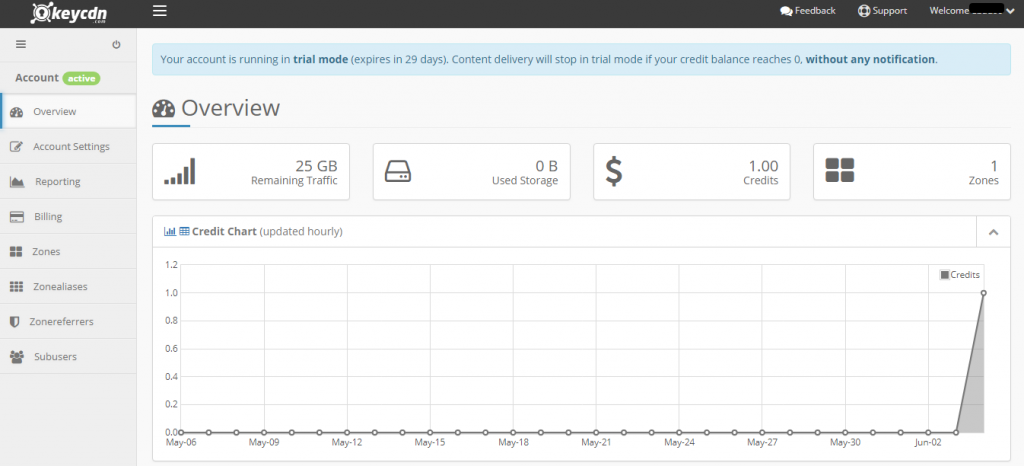
Navigate to Zones from the side menu to add a zone for your website and to generate CDN URL.
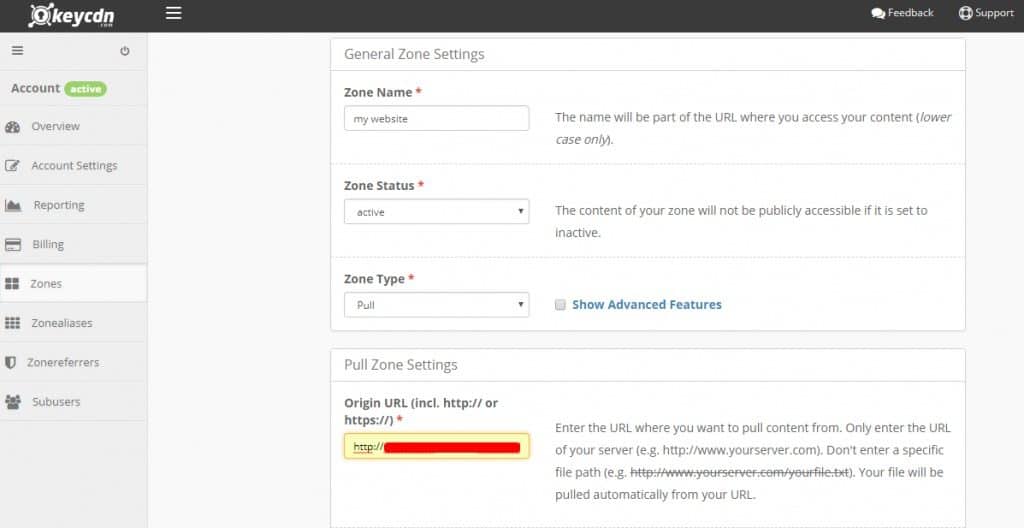
Click on Save button to save the changes. It will take a few minutes to activate your zone and once it’s activated you will see the Status as Active. Next step is to Purge from the Manage drop-down menu under Actions.
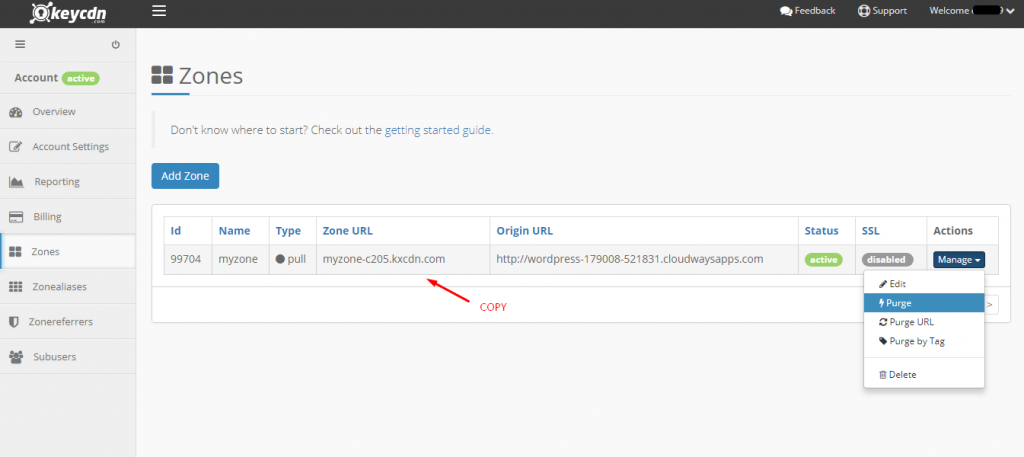
Copy the Zone URL and save it for the next step.
Installing a Plugin
In the step above we successfully generated CDN service for our WordPress site. Now we need to configure our WordPress site so it can work with CDN service properly. To do so, we have to require one plugin to be installed on our WordPress site.
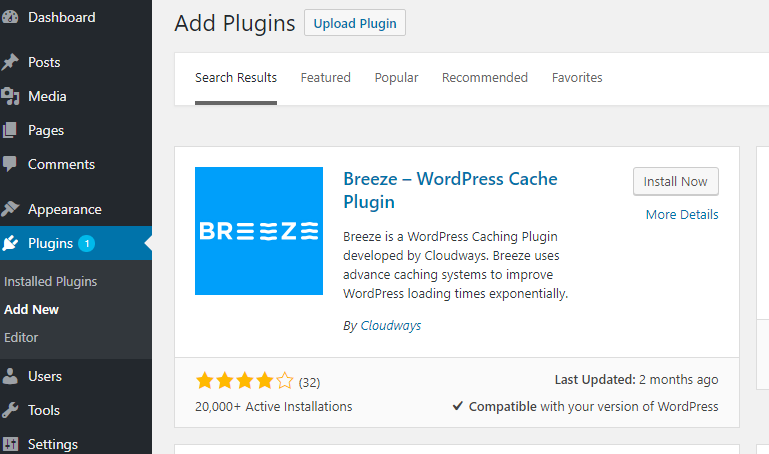
Log into your WordPress dashboard and Add New plugin from the Plugins option. Search for Breeze – WordPress Cache Plugin.
After installation, activate the plugin and go to its settings. Click on CDN tab and paste the Zone URL you have already copied from KeyCDN dashboard.
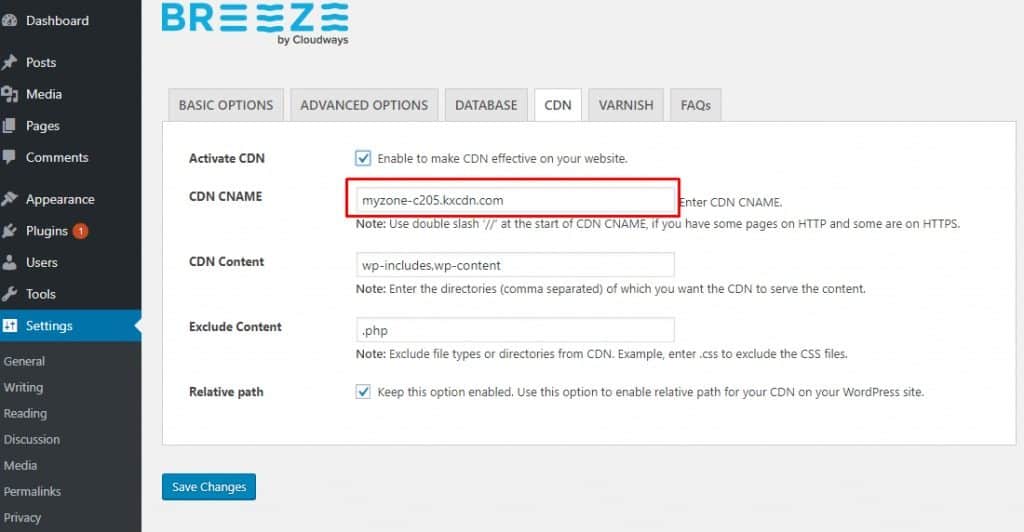
Click on Save Changes to implement the CDN.
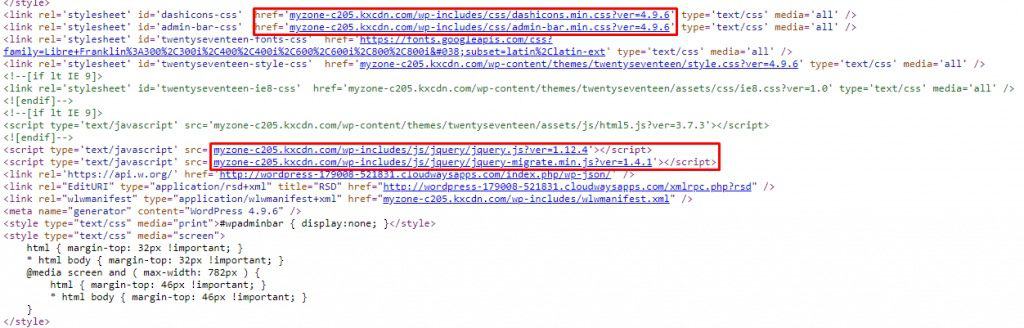
That’s it! You have successfully integrated CDN to your WordPress site. To confirm the integration, browse your site in any web browser and access its source code. If the integration was successful you will see the files are being downloaded via KeyCDN servers.
Benefits of Having a CDN in WordPress
WordPress is a content management system which consumes a fair amount of both static and dynamic data. Typically a WordPress site is built on a template or theme and harnesses some of its functionalities through plugins. Content such as header, footer, banner images and menu does not change very often and can be cached by CDN service. Besides caching CDN offers other benefits as well:
Saves Bandwidth:
Since CDN caches the content and supplies its own copy without actually fetching from the web server, it will save you a lot of bandwidth. This may not sound big but it can save big bucks in server expense for high traffic sites.
Security:
Security is one of the highest issues for WordPress users but it can be addressed by using a CDN on a WordPress site. CDN hardens the security as it is optimized to identify notorious security threats like Distributed Denial of Service (DDoS) attack and spamming activities using bots and scripts.
Tackle High Traffic:
Websites with high traffic volume can leverage the network of CDN servers. The cached content is readily available for the end user even if the web server is loaded with new requests.
Speed:
It improves page loading speed significantly as it reduces the latency effect by supplying cached content stored in one of the many servers located around the world. This contributes to user experience and also reduces the bounce rate as users tend to spend more time on your website.
Final Thoughts
In this article, we discussed what a CDN is and how it works. We also looked at some of the popular CDN providers and investigated how to integrate a couple of them to a WordPress site. We also understood the benefits a CDN can bring to a website and the kind of businesses which are already using CDN on their sites for better user experience. Share your experience with your CDN provider.
The post How to Add CDN to WordPress Website appeared first on WebsiteSetup.org.

- AIStaffs Review – 8 Amazing Features Revealed With Exclusive Demo - May 28, 2023
- VideoXQ AI Review – Is It The Best Explainer Video Maker In 2023? - May 19, 2023
- How To Start Affiliate Marketing For Beginners – Step By Step Guide In 2022 - February 27, 2022